Does it fit? Will I ever really wear this? Are there any rips or tears? Do I love it? Do I really need a furry hat with tassels?
Be honest with yourself. Just because you may lose weight this summer, will those jeans really be what you want to wear? When going through your items, divide them into 6 piles: save, relocate, donate, sell, recycle, and trash. The answers to your questions will help you put items in the right piles. Whatever is in the save pile goes back in, everything else goes.
Doesn't that feel great?!
EASY STEP #3 - PUT LIKE WITH LIKE
Create categories to keep your closet orderly. Having categories such as tank tops, sweaters, long sleeve, short sleeve, etc.. will not only make the space look better, it will also make it easier to find what you are looking for. You can find more category ideas in my free Clothing Category Guide here.
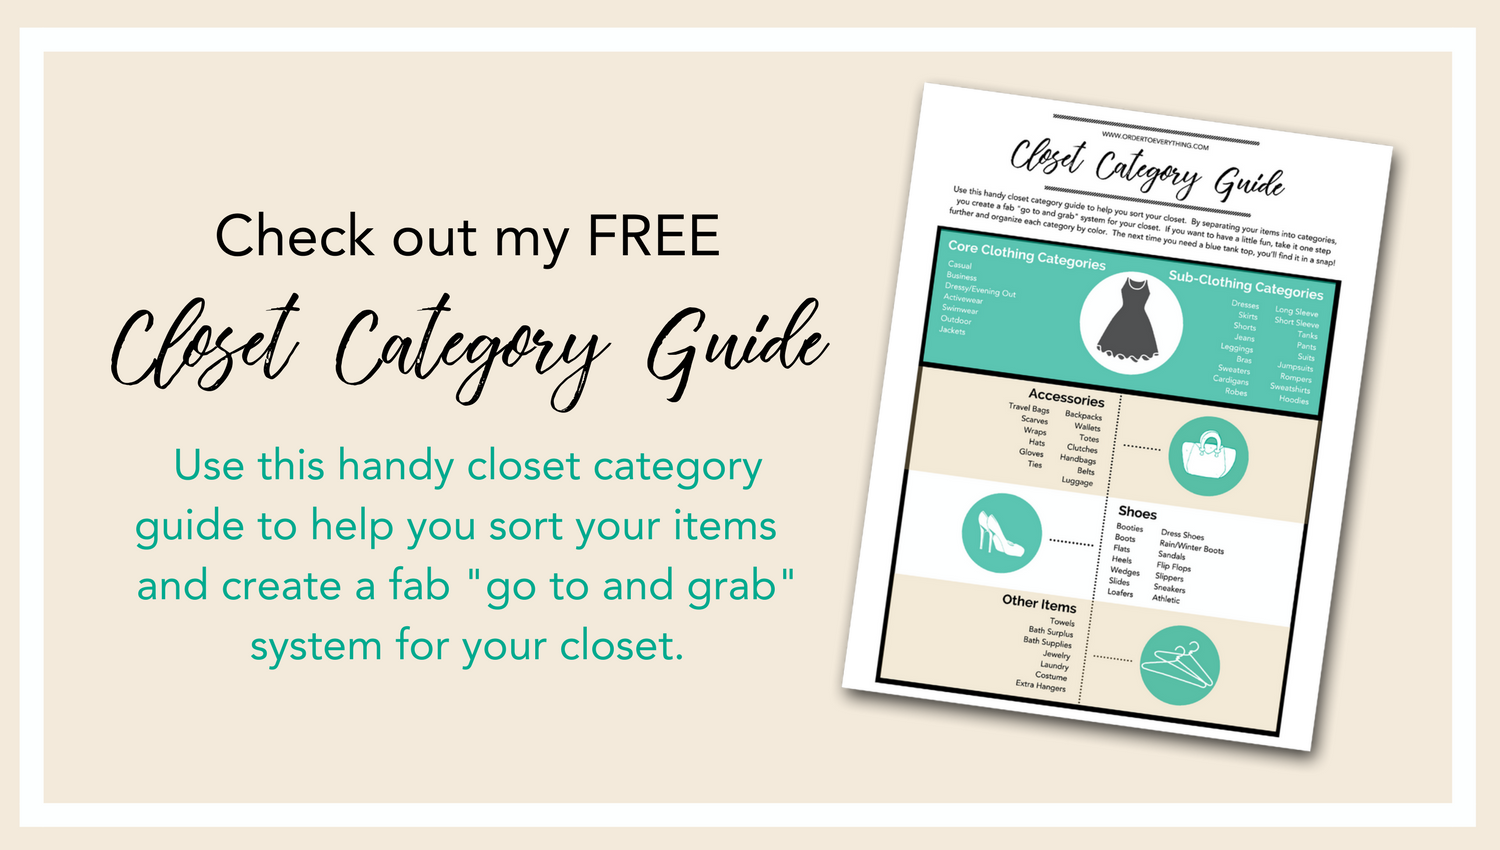
Start by separating clothing by type such as season, business, casual, etc... For example, separate your date night attire from your every day, on the go wardrobe.
Once you have your core types, move on to create sub-categories within those types as mentioned above. Long sleeve, short sleeve, tank tops, etc... This will create an additional layer of categorizing to amp up an easy “go to and grab” system for your closet.
If you want to have a little fun, take it one step further and organize each category by color. The next time you need a black tank top, you’ll find it in a snap!
EASY STEP #4 - TAKE INVENTORY
Time for the fun! Now that you know what you’re going to save, it’s time to gather any bins, hangers, etc.. you may need to put it all in place. Begin by putting everything back in the closet where you want it to go and take inventory.
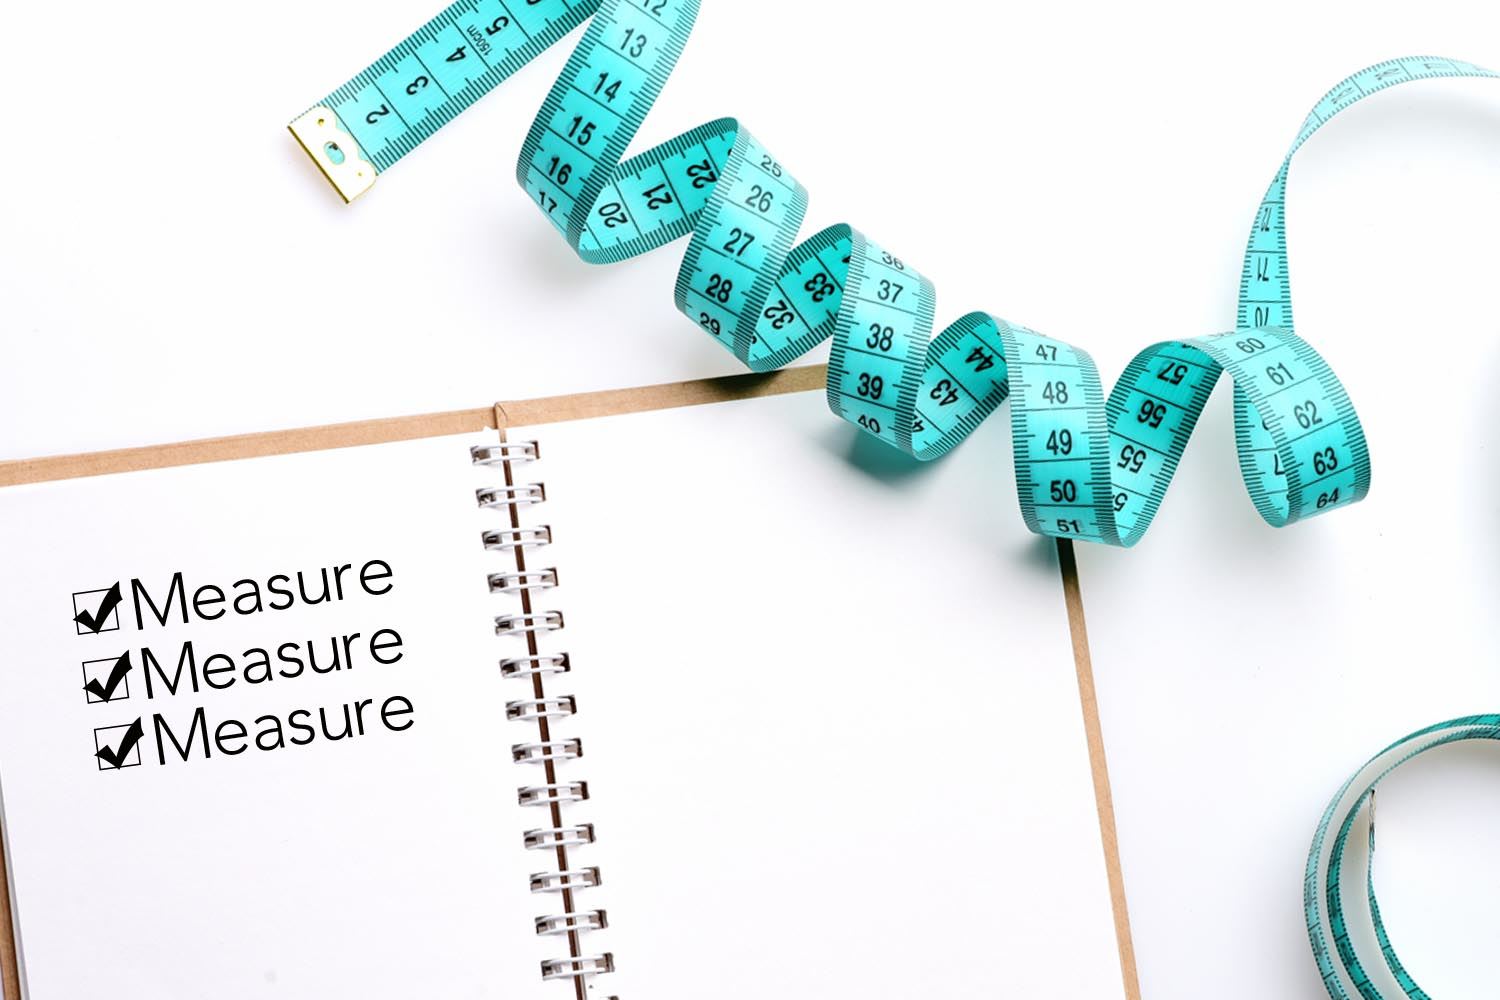
Create a list of containers, shelves, hangers, etc.. needed to house your items and measure, measure, measure.
You may think that measuring the shelf is enough, but measuring what is being placed there is essential as well in finding the right size container or organizing solution.
Think height, width, and depth of everything from the shelving, that stack of purses you’re going to hang, to how long those 3 rows of shoes are and write it down. You’ll thank yourself later with a latte or glass of wine, promise! With your measurements of height, width, and depth in hand, or on your phone (I use Asana, check it out here), it’s time to go shopping!
…did you remember to measure?
EASY STEP #5 - PUT IT ALL IN PLACE
You’ve gone shopping and you have everything to need to complete your closet. With your new containers and organizing solutions, place all of your items in their new homes.
Create labels for bins and, voila! You have an organized closet.
HERE ARE A FEW TIPS TO AID IN YOUR CLOSET ORGANIZING PROJECT:
- Velvet hangers streamline the look of a closet, eliminate hanger bumps on clothing and maximize hanging space. I get mine at Costco.
-
If you’re tight on time, start working on one section of the closet first and move on to other sections as you go.
-
Use space saving shoe holders or shoe bins to create more space for your shoes.
-
Always measure the largest item to go in an area when measuring for bins to ensure everything will fit.
-
Think vertical. Most closets have a ton of space above the top shelf. Store luggage, stack bins with lids to house seasonal or rarely used items, or add shelving to utilize the space to your advantage.
I’m going to be tackling my Master Closet. I'll be documenting my progress on Facebook next month. What closet are you going to conquer to clear your clutter?
I’d love to know and see what you’re doing! Come visit me on Facebook or Instagram and share your progress, your pains and your wins.
Don’t forget to download my FREE Clothing Category Guide! Click here to grab it.
This page contains affiliate links which means I will earn a commission if you use those links at no additional charge to you. I only recommend products and brands I use and trust.
.png)
